How to Inspect a Used Commercial Refrigerator Before Buying
Buying a used commercial refrigerator is one of the smartest equipment decisions a restaurant owner, café operator, or catering business in India can make. A quality pre-owned unit from a reputable brand can be purchased at 35–60% below its new price — and if properly maintained, will deliver years of reliable service at a fraction of the capital cost.
But the savings only materialise if you buy the right unit. A used commercial refrigerator that looks presentable on the outside can conceal a failing compressor, a refrigerant leak, extensive limescale buildup, a broken defrost system, or compromised insulation — any of which will either fail soon after purchase or cost more to repair than the savings justified.
The difference between a great pre-owned purchase and an expensive mistake is a thorough, methodical inspection before you commit. This guide gives you exactly that — a step-by-step inspection framework covering every component of a used commercial refrigerator, with specific guidance for the conditions and challenges of the Indian market: hard water scaling, voltage damage, high ambient temperatures, and the realities of finding used equipment through platforms like BuySellHoReCa.com.
Before You Inspect: What to Establish First
A physical inspection is the centrepiece of any used refrigerator purchase — but there are several things to clarify before you even look at the unit.
Confirm the Brand and Model
Ask the seller for the make, model number, and year of manufacture before visiting. With this information you can:
Verify spare parts availability — search for the model on Indian spare parts distributor websites and major e-commerce platforms. If gaskets, compressor models, and electronic controls are not readily available in India, a breakdown after purchase becomes very expensive.
Identify authorised service centres — check whether the brand has an authorised service network in your city. Brands like Haier Commercial, Blue Star, Voltas, Carrier, Hoshizaki, True, Turbo Air, and Electrolux Professional have varying levels of service presence across Indian cities.
Download the technical specification sheet — this tells you the rated capacity, electrical load (amperage and voltage), refrigerant type, and operating temperature range. Compare the spec against what the seller tells you.
Research the model's reputation — online forums, hospitality industry communities, and dealer feedback on specific models reveal known failure points that should sharpen your inspection focus.
Ask About the Operating History
Before inspection, ask the seller these questions:
How many years has the unit been in service?
What type of establishment was it used in — a high-volume restaurant, a hotel, a retail store, or a low-volume café? A unit from a busy hotel kitchen has far more hours on it than one from a small café, even if the calendar age is the same.
Has it been under an AMC (Annual Maintenance Contract) with an authorised service partner? Ask for documentation.
Has the compressor been replaced? When? What was replaced with — an original-specification compressor or a generic substitute?
Has it ever lost cooling capability for an extended period? This can indicate a refrigerant leak that was recharged without fixing the root cause.
What is the reason for sale? Renovation, closure, upgrade, or persistent problems?
You are not obligated to believe every answer — but the consistency between what the seller says and what you find during the inspection is itself informative.
Agree on Inspection Conditions
Before visiting, confirm:
The unit must be switched on and running at the time of inspection — not powered down or "warming up." An operational unit that has been running for at least two hours allows you to check temperature stability.
You will be bringing (or the seller will provide) a calibrated probe thermometer to measure internal temperature.
You have the right to open panels, pull shelves, inspect the condenser area, and operate all controls. Any seller who restricts access to components should be treated with caution.
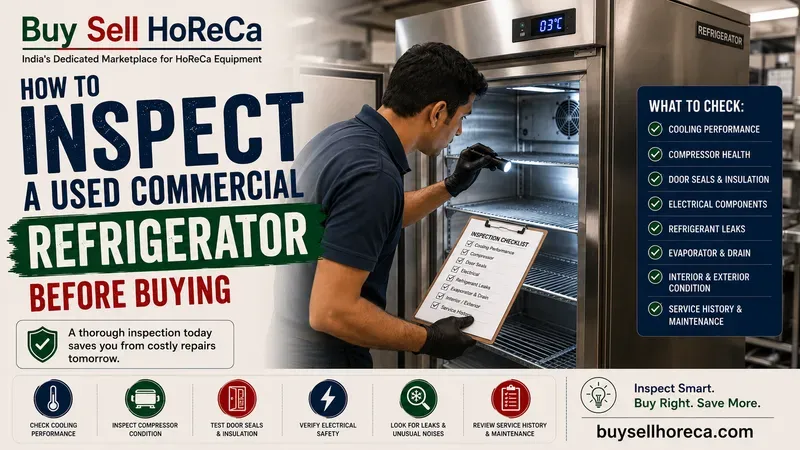
The 10-Point Inspection Framework
Work through this framework systematically. Take notes and photographs throughout — they are useful when negotiating price based on findings.
Inspection Point 1: External Cabinet Condition
Start from the outside and work inward.
Stainless steel surfaces: Walk around the entire unit. Stainless steel surfaces should be free from:
Deep dents or buckled panels — which can indicate that the unit has been dropped or struck, potentially damaging internal insulation or the refrigerant circuit
Surface rust — while surface rust on stainless steel often indicates a lower grade of steel (not Grade 304) or exposure to chloride environments, it can also be cosmetic and treatable. Rust penetrating the panel surface is more serious.
Cracks or separation at panel joints — which allow moisture into the insulation foam
Run your hand along all seams and joins. The cabinet should feel structurally solid with no flex or movement when you press on the panels.
Legs, wheels, and levelling feet: Check that the unit sits level (use a spirit level or the bubble level in a smartphone). A refrigerator that is not level will have door alignment issues and may accumulate condensate in unintended areas. Check that castors or levelling feet are all functional and not corroded solid.
Model and serial number plate: Locate the data plate (usually inside the door or on the rear panel) and confirm it matches what the seller told you. Note the refrigerant type specified — this matters for servicing and is required information in India under environmental regulations for refrigerant handling.
Inspection Point 2: Door Gaskets and Seals
The door gasket is the most wear-prone component on any commercial refrigerator — and one of the most important for both food safety and energy efficiency. A failing gasket forces the compressor to run almost continuously, dramatically increasing energy consumption and accelerating compressor wear.
Visual inspection:
Run your finger along the full perimeter of every door gasket. The rubber should be soft and pliable — not cracked, hardened, or brittle.
Check for tears, splits, or sections where the gasket has pulled away from the door frame channel.
Look for mould growth in the gasket channel — particularly in the folds of the magnetic seal. Mould here is common and treatable, but heavy colonisation suggests the gasket has been consistently damp, which accelerates deterioration.
Check whether the gasket has been repaired with tape or sealant — a sign it has been failing and the seller has covered it rather than replacing it.
The paper test: Close the door on a sheet of A4 paper, halfway along one edge. Pull the paper — you should feel clear resistance. Repeat this test at all four sides and all four corners of every door. If the paper slides out freely anywhere around the perimeter, the gasket compression at that point is insufficient and the door is not sealing correctly.
Gasket replacement cost note: A replacement door gasket for most commercial refrigerators in India costs ₹800–3,000 depending on the brand and model. It is a straightforward repair, but it must be factored into your offer price if the gasket is compromised. For rare imported models, gasket lead times can be 3–6 weeks — an important operational consideration.
Inspection Point 3: Interior Cabinet Condition
Open every door and inspect the interior thoroughly.
Interior walls and floor:
The interior walls, ceiling, and floor of the cabinet should be smooth, clean, and intact — typically white-painted steel, aluminium, or stainless steel.
Look for cracks or delamination in the interior lining. Cracks allow moisture to penetrate into the insulation foam — once wet, foam insulation loses efficiency rapidly and the damage is irreversible without major cabinet reconstruction.
Check the floor of the cabinet for rust spots — which indicate water has been pooling, either from a blocked drain or condensation from a defrost system problem.
Look for any unusual odours — a musty smell indicates mould; a sharp chemical smell can indicate refrigerant ingress from an internal leak.
Shelving and shelf supports:
Pull out all shelves and inspect for rust, warping, or broken support brackets.
Check that the shelf wire or surface is intact and food-safe — rusted or corroded shelving must be replaced before the unit goes into food service.
Replacement shelving for common models is available in India, but confirm availability for the specific model before purchase.
Drain and drain pan:
Locate the interior drain hole (usually a rubber-stoppered hole in the floor of the cabinet) and check it is clear and unblocked.
If accessible, check the drain pan at the base or rear of the unit. A drain pan caked in organic material indicates poor maintenance — and potentially chronically blocked drainage that has caused the pooling you may have noticed on the cabinet floor.
Temperature reading: Place your calibrated probe thermometer in the geometric centre of the cabinet, at mid-shelf height — away from the walls and the evaporator. Allow five minutes for the reading to stabilise. A properly functioning refrigerator should be holding between 1°C and 4°C under normal operating conditions. A temperature above 6°C in a unit that has been running for more than two hours is a red flag — indicating a refrigerant, compressor, or defrost system issue.
For freezer units, the target is -18°C or below. A freezer struggling to hold below -12°C has a significant performance deficit.
Inspection Point 4: Door Hinges, Handles, and Closing Mechanism
Hinges: Open and close every door slowly, watching and feeling for:
Resistance or binding at any point in the swing — indicating bent hinge pins, worn bushings, or a misaligned door
The door dropping as it opens (hinge wear allows the door to sag)
Loose hinge screws or cracked hinge mounting plates
A misaligned door causes uneven gasket compression around the perimeter — and is the cause of many gasket failures that would otherwise seem premature.
Self-closing mechanism: Quality commercial refrigerators are designed to self-close from any open position — typically via a spring-loaded hinge or a magnetic closure assist. Test this: open the door to 90 degrees and release it. It should swing closed and seal fully. If it stops short or swings back open, the self-close mechanism needs adjustment or replacement.
Door handles: Check that all handles are firmly attached and operate smoothly. Loose handles are a minor but genuine safety issue — a handle that comes away in a staff member's hand while pulling a heavy door is an accident risk.
Inspection Point 5: Condenser Coil and Condenser Fan
The condenser is where the refrigeration system releases heat to the surrounding environment. In Indian kitchens, condenser coil condition is one of the most revealing indicators of how well — or poorly — the unit has been maintained.
Locating the condenser: On most commercial upright refrigerators, the condenser is accessed via a removable panel at the bottom front or at the rear of the unit. On walk-in units, the condenser unit is typically separate (remote mounted). Ask the seller to remove the access panel so you can inspect the coil.
What to look for:
Dust and grease accumulation: A coil coated in a thick layer of dust and grease is the most common finding on poorly maintained used refrigerators. While this is cleanable — and a good negotiation point — very heavy accumulation over years can cause the aluminium fins to corrode and the coil itself to be damaged. Run your finger gently across a section of fins; light dust is normal, but solid grease deposits signal chronic neglect.
Fin damage: The aluminium fins on the condenser coil are delicate and can be bent by cleaning tools used incorrectly. Look across the coil surface at a low angle in good light — the fins should be uniform and open. Crushed fins reduce airflow across the coil and cannot be fully restored.
Corrosion: In coastal cities (Mumbai, Chennai, Kochi, Visakhapatnam) and in humid environments, condenser coil corrosion — visible as white oxidation on aluminium fins or rust on the steel frame — indicates salt air or chemical exposure. Corroded coils have reduced heat transfer efficiency.
Condenser fan: The condenser fan blows air across the coil to aid heat dissipation. With the unit running and the access panel removed (if safe to do so), listen to the condenser fan:
It should run continuously and quietly
Any grinding, rattling, or intermittent operation indicates a failing fan motor or a blade that is loose or contacting the housing
A failed condenser fan is a ₹1,500–4,000 repair but causes rapid compressor overheating if not addressed
Inspection Point 6: Compressor — The Heart of the System
The compressor is the most expensive single component in any refrigeration system — and the one whose failure most commonly makes a used unit uneconomical to repair. A compressor replacement costs ₹8,000–35,000 depending on the unit type and brand.
You cannot directly inspect a compressor's internal condition without specialist tools, but you can make a strong assessment through the following:
Sound test: With the unit running and the condenser panel removed, listen to the compressor carefully:
Normal operation: a smooth, consistent hum. The sound may cycle on and off as the thermostat calls for cooling, which is normal.
Warning signs: A hard, clanking startup (liquid slugging — indicates refrigerant or oil in the cylinder), a continuous high-pitched whine (worn bearings), intermittent clicking followed by a failed start and then restart (failing start capacitor or compressor approaching end of life), or a compressor that starts and then cuts out after 30–60 seconds (overload protector tripping due to overheating).
Touch test: After the unit has been running for at least 30 minutes, carefully touch the compressor body (not any pipework — refrigerant lines can be very cold or very hot). The compressor body should be warm but not hot to the touch. An overheating compressor — too hot to hold your hand against — is a unit in distress.
Running time: Observe the compressor's duty cycle over 15–20 minutes. In a normally operating refrigerator at typical Indian ambient temperatures (28–35°C), the compressor should run for periods and then cycle off as the thermostat is satisfied. A compressor that runs continuously without cycling off — in a unit that is still not achieving target temperature — indicates a refrigerant or efficiency problem.
Age and replacement history: Ask directly: has the compressor been replaced? If yes, when? An original compressor on a seven-year-old unit that has been well-maintained is more reassuring than a replacement compressor of unknown origin on a five-year-old unit. Ask to see any documentation of compressor replacement work.
Inspection Point 7: Evaporator and Defrost System
The evaporator is the internal coil (usually behind the back panel inside the cabinet) that absorbs heat from the food and air inside the cabinet. The defrost system periodically heats the evaporator to melt accumulated ice — preventing frost buildup that would eventually block airflow and cause the cabinet temperature to rise.
Signs of a defrost system problem:
Visible frost or ice buildup on the internal back panel inside the cabinet — indicates the defrost system is not completing cycles correctly
A significant amount of ice around the evaporator fan (if visible) — blocks airflow and reduces cooling efficiency
A cabinet temperature that has been rising progressively over weeks — a classic sign of frost-blocked evaporator
What to do: Ask the seller to confirm when the last defrost cycle ran. If the unit has heavy frost buildup, ask for it to be manually defrosted before your inspection so you can assess the evaporator condition underneath. A defrost system repair (replacing the defrost heater, timer, or termination thermostat) typically costs ₹2,000–6,000 — factor this in if defrost issues are evident.
Evaporator fan: Inside the cabinet, the evaporator fan circulates cold air. With the door briefly open, you should hear the fan running. Listen for rattling or unusual noise — a failing evaporator fan motor causes uneven temperature distribution inside the cabinet.
Inspection Point 8: Electrical Components and Controls
Control panel and thermostat:
Test the thermostat by adjusting the temperature set point up and down — the display (on digital units) should respond immediately. On analogue thermostat units, turn the dial and listen for the compressor to respond within a short period.
Check that all lights, displays, and alarms on the control panel are functional.
On units with electronic controllers, check for error codes on the display — manufacturers publish error code guides online that can reveal known issues the seller may not have volunteered.
Power cord and plug:
Inspect the entire length of the power cord for cuts, fraying, heat damage, or crushing.
The plug should be the correct type for the unit's power requirement (single phase 230V for most small to medium units; three-phase for large walk-in units).
Scorch marks on the plug or socket — or a plug that fits loosely — are significant warning signs of previous electrical problems.
Voltage stabiliser: In India, running a commercial refrigerator without a voltage stabiliser exposes the compressor to potentially damaging voltage fluctuations. Check whether the seller's unit is running with a stabiliser. If not, factor a servo voltage stabiliser into your post-purchase costs (₹4,000–10,000).
Inspection Point 9: Water Drainage and Hard Water Scale
This inspection point is particularly important for units that have operated in Indian cities with hard water — Delhi, Jaipur, Chandigarh, Ahmedabad, and many others.
Interior drain: Pour a small amount of water (use a bottle) into the interior drain hole. Watch what happens: the water should drain away within a few seconds. If it pools and drains slowly, or does not drain at all, the drain line is blocked — likely with a combination of food debris and mineral scale.
Drain pan: If the drain pan is accessible, remove it and inspect. A drain pan with thick mineral deposits and organic buildup indicates years of poor drainage management. A blocked drain causes water to pool inside the cabinet, producing the floor rust and odour problems discussed in Inspection Point 3.
Descaling need: On units from hard water areas, the evaporator, drain line, and any water-connected components may require professional descaling before the unit reaches optimal performance. Factor ₹1,500–4,000 for a professional descaling service into your cost estimate.
Inspection Point 10: Overall Performance Summary and Benchmark Temperature
At the end of your inspection — having opened and closed doors, removed panels, and observed the unit for at least 30–45 minutes — take a final temperature reading.
Place your probe thermometer at three points: top shelf, middle shelf, and near the floor. On a properly functioning unit:
All three readings should be within 2°C of each other — indicating even air distribution from a functioning evaporator fan
All three readings should be within the target range (1°C–4°C for refrigerators; -18°C or below for freezers)
A unit with a wide temperature spread (e.g., top shelf at 2°C and floor at 9°C) has airflow distribution problems — likely a partially blocked evaporator, failing evaporator fan, or overloaded shelving arrangement during normal use.
Document the readings with a photograph of your thermometer at each shelf position.
Sending a Technician When You Cannot Inspect in Person
Platforms like BuySellHoReCa.com connect buyers with sellers across India — which means you may find an ideal unit in a city different from your own. In these cases, engage a local refrigeration technician to conduct the inspection on your behalf. Brief them using this checklist — a qualified technician can additionally measure compressor amperage draw (revealing compressor health) and check refrigerant pressure, which go beyond what a non-technical buyer can assess directly.
The cost of a technician inspection (₹500–2,000 depending on city and scope) is a worthwhile investment against a purchase of ₹20,000–2,00,000+.
Negotiating Based on Your Inspection Findings
A thorough inspection almost always reveals something. Use findings systematically to negotiate:
Document your findings clearly and present them factually — not as complaints, but as a cost-of-ownership calculation that justifies your revised offer.
Red Flags: When to Walk Away
Not every used refrigerator is worth buying at any price. These findings should prompt you to decline the purchase:
Compressor showing audible failure signs (clanking, repeated cut-outs, refusal to start) — repair cost likely exceeds the unit's value
Visible refrigerant oil stains on pipework or the floor beneath the unit — indicates a refrigerant leak that has been losing oil; a sign of a compromised system
Interior lining cracks with visible foam behind — insulation compromise is effectively irreparable
Seller refuses to allow inspection of any component — a legitimate seller has no reason to restrict access
Unit will not achieve anywhere near target temperature after two or more hours of running — fundamental refrigeration system failure
No spare parts or service support for the brand in India
Unknown refrigerant type not identifiable from the data plate — non-standard refrigerant conversions can cause compatibility and safety issues
Where to Find Quality Used Commercial Refrigerators in India
BuySellHoReCa.com is India's dedicated marketplace for new and pre-owned HoReCa equipment. The platform lists commercial refrigerators across all categories — upright single and double-door units, under-counter refrigerators, display chillers, chest freezers, and walk-in cold rooms — from verified sellers across Delhi NCR, Mumbai, Bengaluru, Hyderabad, Chennai, Pune, Kolkata, and other major cities. Buyers can compare listings, contact sellers directly, and visit for inspection before committing.
Final Thoughts
A used commercial refrigerator bought with eyes open is one of the best-value equipment decisions in the Indian HoReCa market. A used commercial refrigerator bought without a structured inspection is a gamble — one that sometimes pays off and sometimes results in a repair bill that wipes out the original saving.
This inspection framework takes 45–60 minutes on-site. It costs nothing but time. And it is the difference between buying with confidence and buying with fingers crossed.
Use the checklist. Take the photographs. Run the tests. Negotiate on findings. And when you are satisfied, buy with confidence.
Ready to find quality pre-owned commercial refrigerators from verified sellers across India? Browse listings at BuySellHoReCa.com — India's dedicated HoReCa marketplace.